
This will cover the basics of how to create your own mod from installing the software needed, to building and injecting your first mod.
This documentation will be for things we find out about VTOL VR and what to share such as methods to receiving player input to added new vehicles. This section will be added upon when people find out new things to share.
Helpful links will be a collection of useful sites people have used to help them create the mods and understand what they can do in the Unity engine.
You can download Visual Studio for free from the Microsoft website , when installing make sure to include the ".NET desktop development".
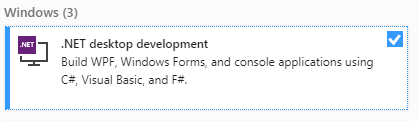
This should give you access to create a Class Library in the .NET framework later on.

You don't need Unity, however, if you want to start importing your own assets into the game then you will need to create asset bundles inside of Unity. I have recommended 2019.1.8 because it is the closest version to the current version of VTOL VR is made in. You can download that version of Unity from their website here. Go to Unity 2019.X at the top, then scroll to Unity 2019.1.8 and download the installer.
Once these are installed, we can next move onto creating a basic mod in Visual Studio.

Now we have downloaded the correct software needed to create mods, we can start making them!
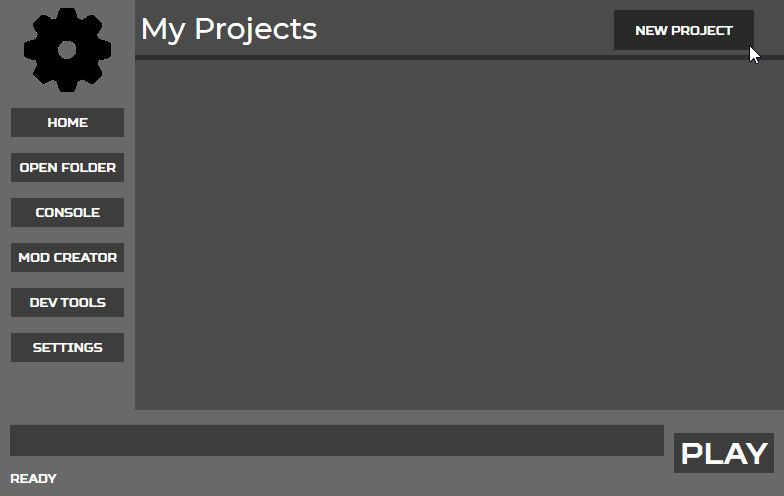
The mod loader provides a template that you can use to get up and running with a blank mod. In the mod creator tab, press the new project button.
Then you'll be able to write out the name of your mod and, it's description (which can be edited later). Make sure Mod is selected in the dropdown at the top right of the window.
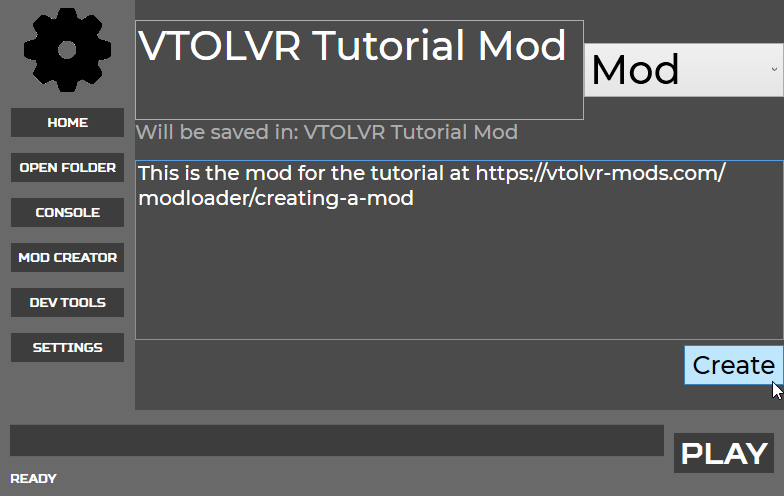
Pressing create will download the latest template and fill out the necessary files needed.
We highly encourage open-sourcing your mods, this helps the community learn and makes it able for people to share feedback. This is why the template project is set up in a way ready to be posted to a new git repository. It includes a .gitingore file, a builds folder and a dependencies folder with instructions.
VTOLVR Tutorial Mod (Folder Structure)
Builds
info.json
Dependencies
Assembly CSharp.dll
instructions.txt
ModLoader.dll
ModLoader.xml
UnityEngine.CoreModule.dll
UnityEngine.dll
VTOLVRTutorialMod
Properties
AssemblyInfo.cs
Main.cs
VTOLVRTutorialMod.csproj
.gitignore
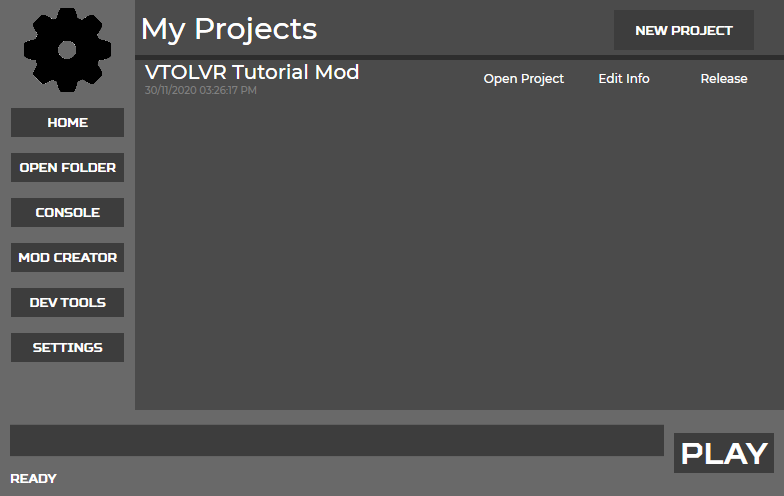
VTOLVRTutorialMod.slnFrom here you can press Open Project to open it in visual studio, Edit Info to edit the information about the mod such as name, description, images etc.
So with what we currently have, it will inject into the game our script but nothing else happens. Let's make a simple button output to the log so we know it's working fine.
Our first bit of code will go in Main.cs. We're just going to do something
simple and log a message saying hello world.
Inside of ModLoaded, we'll place a Log() message. ModLoaded gets called when the player
has pressed the loaded button and the mod loader has finished setting up your mod.
I haven't gone through this code in detail because this is something people with experience
in Unity should know. If this is the first time getting into programming, I recommend at
this step, looking up unity tutorials, any Unity tutorial would apply to this however it
does become a bit harder when applying it to this situation of modding.
public override void ModLoaded()
{
    //This is an event the VTOLAPI calls when the game is done loading a scene
    VTOLAPI.SceneLoaded += SceneLoaded;
    base.ModLoaded();
    Log("HELLO WORLD!!!!!!");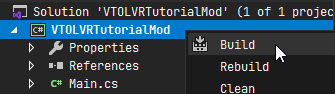
}Now we have our mod create, we need to create the .dll file. Thankfully this is simple, right clicking on the project and pressing Build.
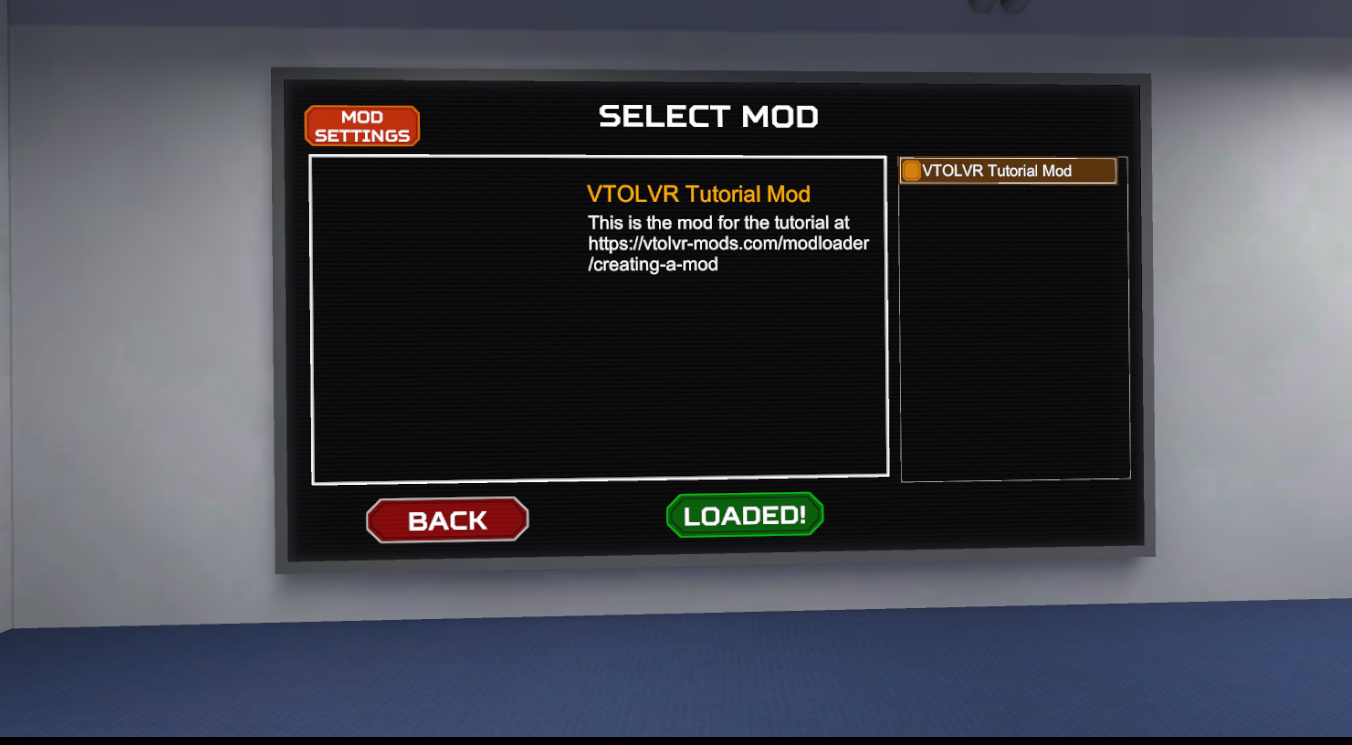
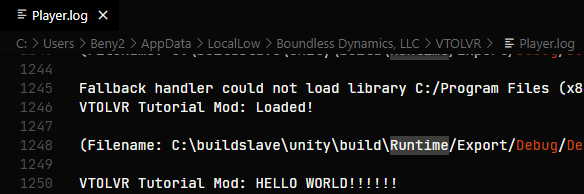
So now when you launch the game and head into the mods tab. You should see your mod at the bottom of the list. And when you load it, the Log() method will be run, and output your message inside of the player.log file.
Once you have finished creating your mod, head over to the release section to learn how to add an image and description to your mod.
Now that you've built your mod, you just need to fill out the required information in the Edit Info page.
The Projects Description supports markdown, the Preview image will need to be square and both the preview image and web image need to below 2MB. Once you've finished that, you can use the release tab to read through the community guidelines and release the mod to get approved by staff.
If your mod needs any dependencies, we've got you covered. Add the required DLLs inside the folder called "Dependencies" and add it into the instructions.txt. Then when the user launches the game, the launcher will copy any dependencies into the Managed folder before they start the game.