
This will cover the basics of how to create your skin from installing the software needed, editing and viewing your skin in-game.
Helpful links will be a collection of useful sites people have used to help them create skins.
For this, we will be extracting the AV-42C but the names and steps will be the same for any other plane. You'll be using Asset Studio for this section.
Once Asset Studio is open you want to open the file resources.assets which is located in
VTOLVR > VTOLVR_Data > resources.assets.
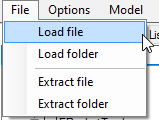
Once it's finished opening, you'll want to search for the name of the vehicle you want to create a skin. It may take a few presses of the Enter button to find it.
VTOL4 = AV-42C
FA-26B = F/A-26B
SEVTF = F-45A
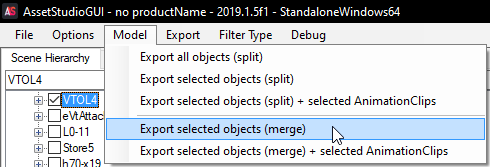
When you have found it, select the checkbox and press
Model > Export selected objects (merge). This will
export it as an fbx and the textures used by that model.

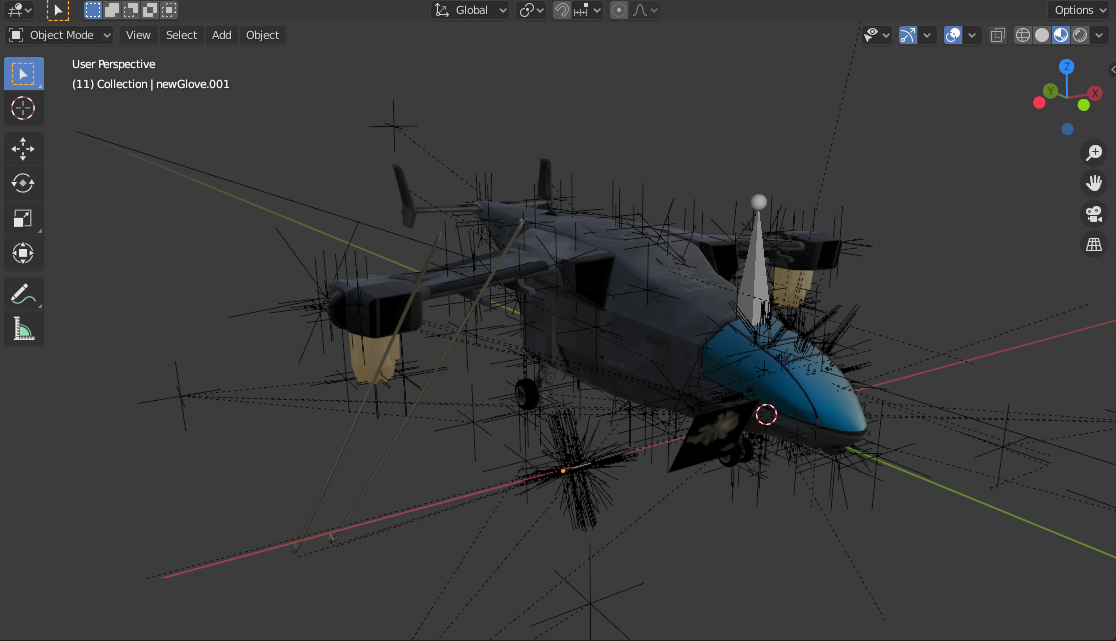
If you open blender and import the model (File > Import > FBX), the final result will look
similar to this.
There is a downside to this export process. As we are exporting it from a Unity prefab there is a lot of
junk which we don't need such as the user interface on the plane and empty game objects. You can delete
these to give you a clear view of the model or leave them in and just zoom in, don't worry if you break
the model, you won't be using this for publishing your skin and you can just reimport the fbx.
Once you're happy with it, I would recommend saving the blender file so every time you don't have to
keep deleting the junk off it.
To view your skin in the game, you'll want to create a folder inside of your skins named the name
what you want your skin to be called in-game.
Then you need to place a preview image with you can view before loading the skin. This is named
0.png, 1.png or 2.png which link to the vehicle.
0.png = AV-42C
1.png = F/A-26B
2.png = F-45A
Then you'll want to name the texture to the material you'll want to change, in most cases, this is renaming
the tex_ at the front to mat_ and then it should work. If you are unsure of what to name it, try looking at
someone else skin for the same vehicle or feel free to ask in the modding discord.