Pages
VTOL VR
Setting up a Unity project
This guide will explain the basic set up you always need for any CSA3 project.
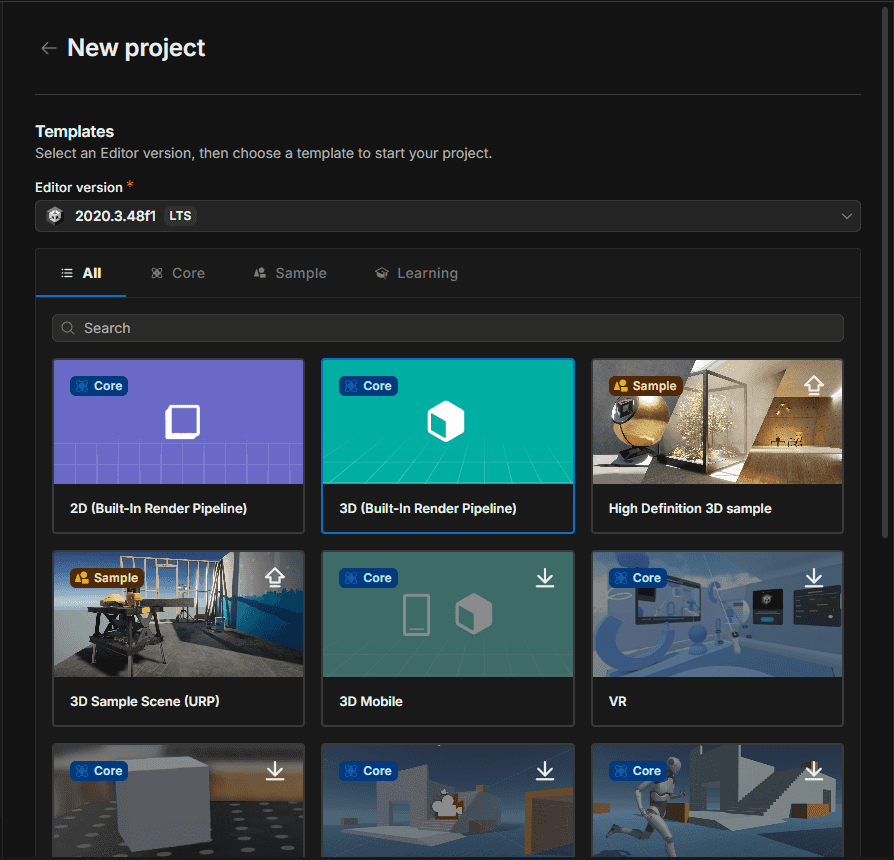
First you need to create a new Unity project using the version VTOL VR is currently in. At the time of writing this is 2020.3.48, so we can just use any 2020.3 version. Make sure to keep it set to 3D (Built-in Render Pipeline)
Now we should have a blank Unity project, next we need to import CSA’s DLLs. There is advanced way you can import these so that they keep automatically updated, but here we will keep it simple.
Steam workshop items get installed on the same Steam library that VTOL VR is installed at, under the workshop folder. For example if VTOL VR is installed at D:\Steam\steamapps\common\VTOL VR, you will need to head to D:\Steam\steamapps\workshop\content for your workshop content.
Next you’ll see a bunch of numbers, these are IDs. First one is the Mod Loader’s Steam app ID, which is 3018410 then it’s the workshop item ID, which is 3521531266. Final path would look along the lines of D:\Steam\steamapps\workshop\content\3018410\3521531266
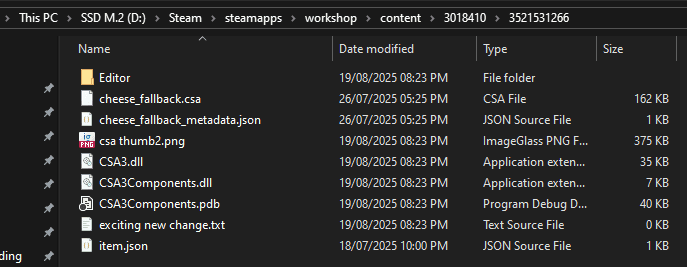
Copy the Editor folder into your Unity project. Then create a Plugins folder and copy CSA3Components.dll and CSA3Components.pdb into it.
After that is all imported you should be able to create a object bundle for CSA3. This will contain the metadata which get used when loading your assets.

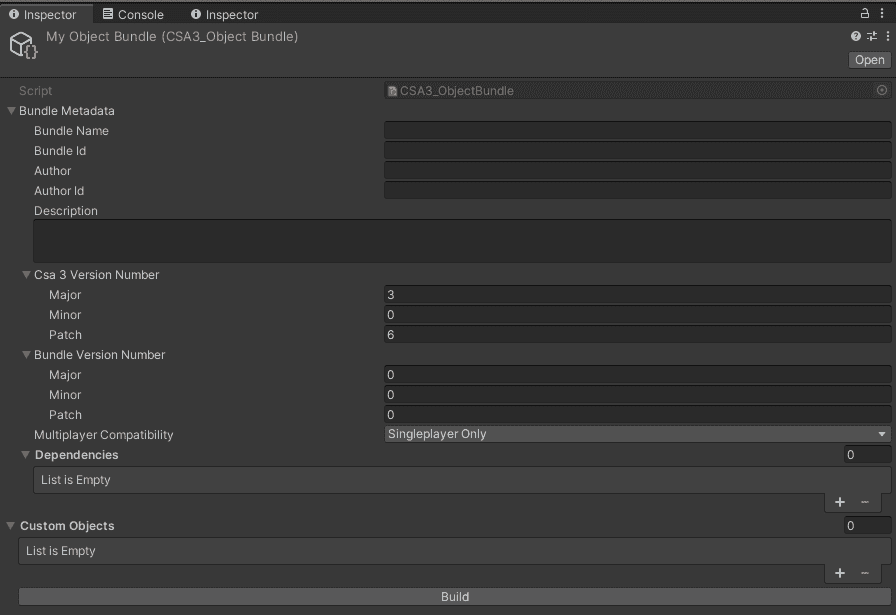
Now we should have an empty unity project set up with just CSA3 installed and a CSA3_ObjectBundle created.
In the next steps, you can now start importing your models, creating prefabs and then turning them into an asset bundle for the game to load.